The other day I did a little behind the scenes video on how I go about recording, uploading, transcribing and distributing my podcast episode. It has garnered some attention and questions from you lovely people and I wanted to give you a proper write-up on my podcast episode creation workflow. There is only so much you pack into 1 minute TikTok video or Instagram Reel.
So in this article, I’m going to break down all the steps in my process and you can use this as a good when creating your workflow. Now I want you to keep in mind that there are tons of workflows, tools, software, strategies and techniques floating around but I am only going to be diving into MY specific process. My process has changed over time (naturally) but the workflow that I have been able to create serves me in multiple ways and has made creating podcast episodes as easy as it can be for me right now.
So let me lay out my hardware and software with links so that you can go and check them out.
Podcast Hardware
Software
- Audacity
- Descript
- Headliner App
- Digipreneur Website
- Podbean (Podcast Hosting)
Step 1 – Ideation
I am super big on repurposing content for multiple formats and platforms. When it comes to getting ideas for the podcast episode, I usually take a look at what I may have created already as a social media post, a blog or even a short-form video. The podcast is one of my main long-form content forms and that allows me to go deeper into a topic, so I would take a look at the content I have already created and I would dive deeper into it via the podcast.
If I am starting out with a brand new idea that I have never talked about before, then I would look at the market research I would have conducted to see usually what are the topics that people are Googling in my niche, I may look at myths/problems I see happening in the space and then start looking at how relevant these topics are.
Most of my episodes are Solo episodes and it’s mainly because I only have to worry about my own personal preparation. When I do guest episodes, I would usually conduct it as a Livestream and as you can imagine, it takes more work and preparation to interview guests. On a Solo episode, I am the expert or I am sharing a process, things I am learning and letting you into my headspace. When I am interviewing someone then I ensure the spotlight is on them and I need to prepare the questions in a way to get all of the information I want out of it.
Now that I have the ideas, prepare my notes/talking points, decided on whether this is a solo episode or we are inviting a guest…I move on to recording. I am only going to dive into how I record a solo episode because I do a completely different workflow and strategy for when I am interviewing guests since I do that as a live stream.
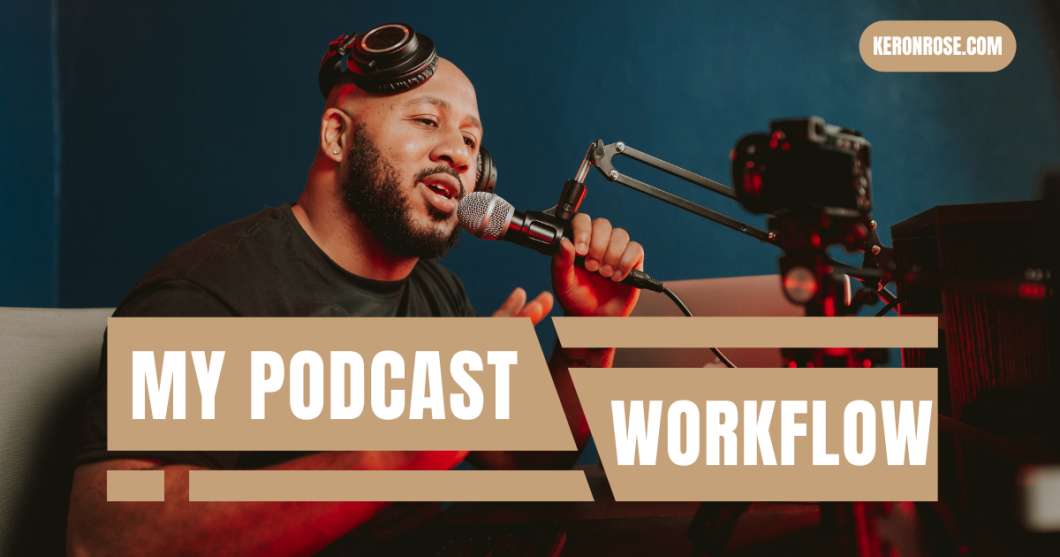
Step 2 – Recording
I use the Rodecaster Pro because it is an all-encompassing podcast studio. It has built-in audio processing, allows for XLR inputs, the midi pad is programmable for music and sound FX, it has just simplified my life.
I was using the Beringer UM2 for the audio interface to connect my XLR mic to my computer before but I would have needed to add in my intro/outro in post and also perform all of the audio processing in post-production afterwards. That just made things a bit more painful for me as it took more time to get a finished episode out.
I fire up the Rodecaster, I have programmed my intro/outro into it so that once I hit Record in Audacity, the intros are already being recorded into the episode.
I use the free program called Audacity to record my episodes. It is a powerful tool on its own and can do a lot of audio processing and sound editing. Feel free to check out the Youtube videos on it if you are just getting started with limited equipment but you want to try to get the best sound out of whatever mic you are using.
My microphone of choice is the Audiotechnica ATR-2100x. It is both a USB & XLR mic. So if you do not have any audio interfaces at all to be able to utilize the XLR cables, then you can connect it directly to your computer via USB. XLR connections are what allow for that studio-like quality, so if you are serious about podcasting, I would make the investment and pick an audio interface like the Beringer UM2 or the Focusrite Scarlet Solo.
I also have Acoustic Panels around the room to absorb any of the echoes that can ruin your audio quality.
Step 3 – Saving The Podcast Episode
Once I have finished recording the podcast episode, I export the audio file as an MP3.
I leave the bit rate mode on preset but I change the quality to Insane – 320kbps and I leave the channel mode on Joint Stereo.
I want to make sure that my audio files are of the best quality. Depending on your computer specs, that will dictate the time it takes to encode your audio file in the 320kbps format.
If you try it and realize your machine is taking over 5-10min to export your audio file then feel free to drop the audio quality down to standard. 170-210kbps is really good quality too and you shouldn’t save in any format below that.
Step 4 – Uploading To Podcast Host
The hosting company that I use for my podcast is Podbean. They are great, have been around for a long time, they make setting up the accounts for Apple Podcast, Spotify and all the directories straightforward.
The big pro with them and why I chose them over Buzzsprout is because Podbean offers unlimited storage space with no cap on the amount of upload hours a month like Buzzsprout. Since most of my episodes usually hit close to an hour and I do 2 episodes per week, I knew that I’d have to spend more money with Buzzsprout.
Podbean & Buzzsprout are 2 of the best hosting companies, so after my research, I was only ever going to choose 1 of them.
I upload the podcast episode to Podbean, fill in the descriptions and put in any relevant links to anything or anyone that I spoke about in the episode.
Once I hit publish, Podbean will push the podcast episode out to all of the directories like Apple Podcast, Spotify, Google Podcast and any other directories that you have registered for.
Step 5 – Transcribing The Episode
This is where one of my favourite tools comes into play, Descript. This tool has a wide variety of functions that I won’t dive into but I implore you to go and check it out.
I use Descript for 3 key reasons.
- I load the episode into descript so that It can fully transcribe the entire episode. Because it edits audio files like a word processor, I can type in a word that I have said in the podcast and get the exact time that I said it and that is how I get the data needed for time stamping my episodes.
- Creating the sub title files that I would use to upload into Headliner to make my audiograms.
Again, this tool has a ridiculous amount of capabilities. It is an Audio & Video studio and editor. You can record your podcast directly into Descript and edit your files from it. I may switch over to it this year myself and leave out Audacity (told you my process changes).
Step 6 – The Digipreneur FM Website
The reason I created a website for the podcast is for a few different reasons that I need to break down, so you can understand the importance of it and why it’s a big part of the workflow.
- I dont want to rely on just the podcast directories to push my podcast and not everyone likes to download an app. The website allows for the audience to listen to your podcast from the website and not have to download anything. The web browsers like Chrome & Safari will allow the podcast to be played in the background even if they close the browser app or lock their screen.
- Website content can be optimized for SEO and increases the chances of discoverability via any of the search engines. This allows me to tap into other areas of the internet that a podcast directory can’t go and overall helps with my monthly downloads, since the browsers usually apart of my top 5 sources of episode downloads.
- I am able to timestamp my episodes on the website and Descript makes the process easier because I don’t have to scrub through the episode to listen for key points. I type in a word, Descript gives me the time I said it and then I put that data onto my website. So now, people do not need to download an app or listen to an entire episode in order to get the information they need.
I also ensure that I get the links for each of the new episodes from Spotify or Apple and add them onto the new episode post so that if someone does check out the post, they can click on a button and subscribe over on any of those platforms.
I am also able to create my featured images in the proper sizes of 1200×630 and when distributed onto social media, they give you that nice big clickable image that is more enticing for people to click through to.
The website also gives me more flexibility when looking at Sponsorship opportunities. I can put an ad on the website, have sponsored posts, I may decide to sign this website up for Google Adsense this year but still thinking on that part.
The main point is the website increases the discoverability leveraging the power of the Search Engines and it allows people to easily listen to my episodes without having to download an app.
Step 7 – Audiograms With Headliner
One of my favourite types of content to create is an Audiogram.
You are essentially taking a piece of the audio from your episode, you can add animations, captions, countdown timers and more.
Descript really makes working with Headliner a breeze.
I would essentially open a new tab in Descript, copy the paragraphs in the podcast that I want to use as an Audiogram and paste it in the new tab. Remember, Descript edits audio and video like a Wordprocessor.
Once I got the paragraph(s) that I want, I hit play and Descript will seamlessly play the audio and edit any gaps in the sound.
Sometimes I take 3 lines from something I said, scroll down and grab another few lines or maybe I made a very long point and I decide to trim the fat. Descript will delete the words you are seeing on your screen and stitch the audio together to make it sound like that is what you had said all along.
After I have the words/audio that I want.
I save the file as an MP3 and I save the Subtitles file as well.
I load those 2 files into Headliner and then I design the Audiogram in there. Once it is finished I have a fully designed audiogram with captions and I can download it and post it anywhere as content.
These audiograms are also great to distribute onto platforms like Google My Business, you can upload up to 30-second videos on that platform.
Step 8 – Email List & Push Notifications
This is all a part of your content distribution, letting people know that your new episode is out.
On the Digipreneur FM website, my audience can subscribe to both my email list and subscribe to my notifications list.
The Email list is self-explanatory but essentially the push notifications will send you a notification to either your computer, tablet or smartphone when I make any new content.
It pushes this out automatically from my website and I can also create manual push notifications. The tool I use for my Push Notifications is called One Signal.
The Push Notifications can also be actionable, you can include a link to direct someone so that once they click on the notification, it takes them to where you want them to go.
I love the feature called Intelligent Delivery. What it does is use its algorithms and the subscriber’s history of viewing your notifications, to predict when is the best time to push out a notification to that individual subscriber. So once this feature is turned on, it will only push out the new content when the subscriber is most likely to see and engage with your Notification.
Your email list and push notification subscribers are yours. You own that relationship!
You do not have to worry about algorithms with these channels…Everybody who subscribes will get your email and notification…Getting them to open and engage is the trick lol.
So lovely people, that right there is my entire workflow for creating, recording and putting out a podcast episode.
Do I do all of this every single time? You betcha!
It is a workflow that allows me to create effortlessly and get the content out there for growth & consumption.
Feel free to reach out or jump in the comments if you got questions on the workflow.
I hope you enjoyed this walkthrough of my podcast episode creation workflow.